
I. Key Function Description
The operation panel of the CPM223/CPM253 transmitter includes multiple function keys. Familiarity with each key's function is the basis for parameter setting and calibration.
- CAL key: Activates calibration mode and enters the calibration menu.
- + key / - key: Used to increase or decrease numbers respectively.
- E key: Confirm key, used to enter the next menu level or save settings.
- REL1 key: Manual operation of relay.
- REL2 key: One-touch switching of relay manual/automatic mode.
II. Range Setting Steps
Range setting includes selecting the measurement type and configuring the output current range. The following is divided into two steps.
2.1 Selecting ORP Measurement Mode
- On the main screen, press the E key to display code0.
- Press the + key until 22 is displayed, then press the E key to confirm.
- Enter the Setup1 menu and press the E key.
- Press the + key or - key to select ORP, then press the E key to confirm.
2.2 Setting 4-20mA Output Range
- On the main screen, press the E key to display code0.
- Press the + key until 22 is displayed, then press the E key to confirm.
- Press the - key twice to enter the output menu, then press the E key twice.
- Select 4-20mA and press the E key.
- Set the value corresponding to 4mA and press the E key.
- Set the value corresponding to 20mA and press the E key to confirm.
III. Maintenance Precautions
Regular maintenance ensures long-term stable operation of the transmitter and extends electrode life.
- Electrode cleaning: Regularly rinse the electrode with clean water; recommended interval is one month.
- Electrode calibration: Perform calibration regularly; recommended interval is three months.
IV. Instrument Calibration
Calibration is a key step to ensure ORP measurement accuracy. Please follow the procedure below.
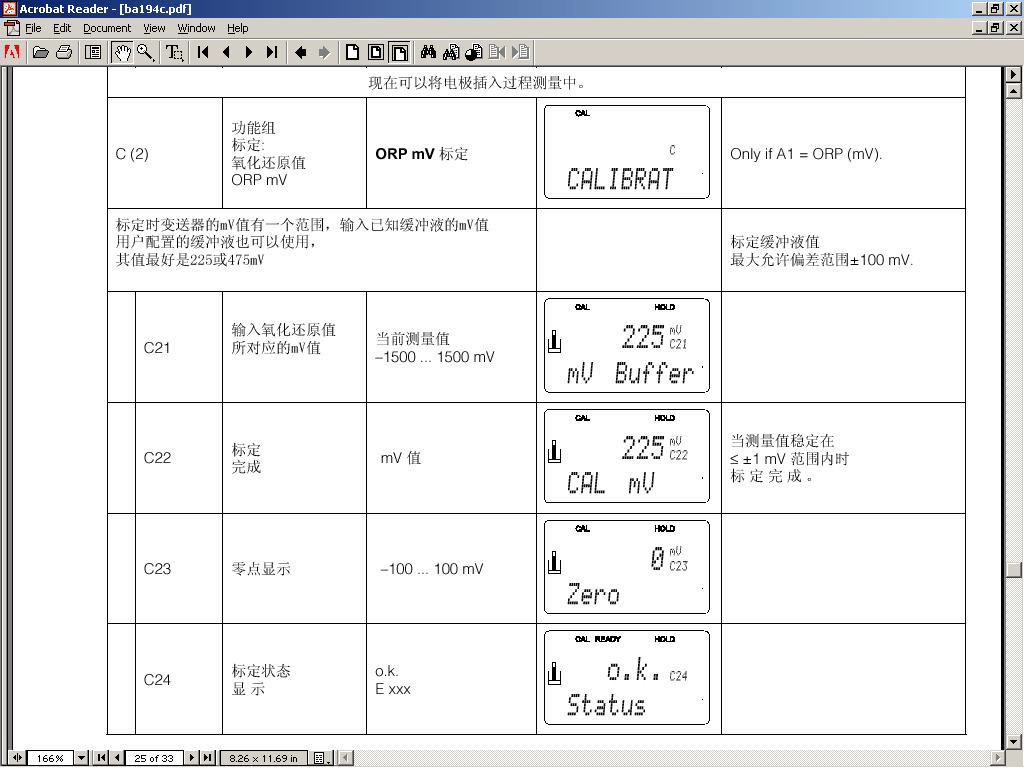
For specific calibration steps, please refer to the transmitter manual, which typically includes entering CAL mode, using standard solutions, and adjusting the display value.