Preparation Before Replacing the Circuit Board of a 10L Flow Meter
Before replacing the circuit board of a 10L flow meter, the following key information must be confirmed and recorded in advance for subsequent data entry and parameter setting. This information can usually be found on the old circuit board or the instrument nameplate.
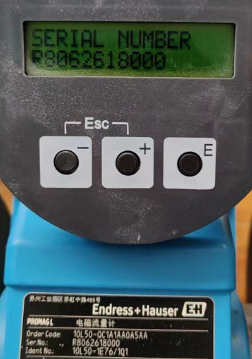
- Customer instrument serial number: Used to uniquely identify the device and ensure parameter matching.
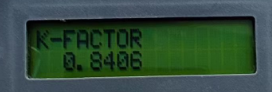
- Flow coefficient (K-FACTOR): Affects flow measurement accuracy and must be accurately recorded.
- Sensor model: Confirm compatibility with the circuit board.
- Caliber: The nominal diameter of the flow meter, which affects flow calculation.
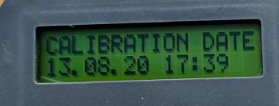
- Flow calibration date: Used to trace the calibration status.
After preparing this information, you can begin replacing the circuit board. Customers performing the replacement themselves can also follow the steps below.
Specific Steps for Replacing the Circuit Board of a 10L Flow Meter
When replacing the circuit board, parameters need to be set in sequence according to the menu prompts. The following steps use the default English interface as an example; the language can be selected as needed.
- Select display language: The default is English, but it can be switched to other languages as needed.
- Select flow meter caliber: Select the corresponding value according to the actual pipe diameter.
- Enter calibration date (CALIBRATION DATE): Fill in the date of the most recent calibration.
- Enter K-FACTOR: Enter the previously recorded flow coefficient.
- Enter serial number: Enter the device serial number as prompted (may need to be entered twice for confirmation).
After completing the above settings, the circuit board replacement is complete. It is recommended to power on and test to confirm that the flow display is normal.
Precautions When Replacing the Circuit Board
To ensure a smooth replacement process, please note the following points:
- Be sure to operate with the power off to avoid damaging the circuit board.
- Record the original parameters to prevent loss.
- If unsure about parameters, contact the manufacturer's technical support.
- After replacement, recalibration is required to ensure accuracy.
By following the above steps, you can efficiently complete the circuit board replacement of the 10L flow meter and restore the instrument's normal function.