
Guide to Initial Commissioning and Parameter Setting of Ultrasonic Level Meter FMU30
This article takes measuring the water level in a bucket as an example to introduce in detail the initial installation, wiring, parameter setting, and verification process of the ultrasonic level meter FMU30, helping engineering technicians quickly master the key points of commissioning.
1. Installation Requirements
Correct installation is the prerequisite for ensuring measurement accuracy. Please operate according to the following requirements:
- Install the device horizontally at the center directly above the bucket.
- Ensure that the probe diaphragm is parallel to the liquid surface.
- Strictly maintain the distance from the probe end face to the bottom of the bucket at 75 cm.
- Keep the edge of the probe at least more than 20 cm away from the bucket wall to avoid sidewall reflection interfering with the sound wave path.
2. Electrical Wiring
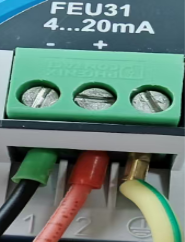
Connect the 24V DC power supply, connect the positive and negative poles to the corresponding terminals respectively, and ground reliably.
- Connect the positive pole of the power supply to terminal No. 2.
- Connect the negative pole of the power supply to terminal No. 1.
3. Basic Parameter Settings
After power-on, select the English interface and metric units, enter the basic setup menu, and set the following parameters in sequence.
3.1 Tank Shape
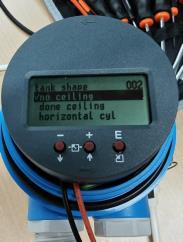
Select the tank shape according to the actual working conditions. In this experiment, select no ceiling (open tank). The meanings of each option are as follows:
| Option | Description |
|---|---|
| A dome ceiling | Domed roof tank |
| B horizontal cyl. | Horizontal tank |
| C bypass / stilling well / ultrasonic guide pipe | Bypass pipe, stilling well/ultrasonic guide pipe |
| D no ceiling | Open tank, for example: landfill, open liquid level, channel, weir |
| E sphere | Spherical tank |
| F flat ceiling | Flat roof |
3.2 Medium Property
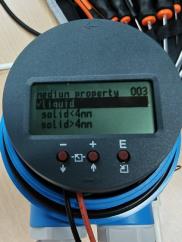
The medium in this experiment is liquid. If measuring solids, select according to particle size:
- solid, particle size < 4 mm (fine)
- solid, particle size > 4 mm (coarse)
3.3 Process Cond
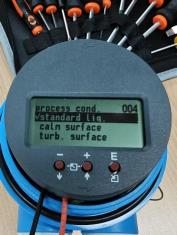
In this experiment, select standard liquid. Other optional conditions include:
- calm surface
- turb. surface
- add. agitator
- fast change
- standard solid
- solid dusty
- conveyor belt
- Test: no filter
3.4 Empty Calibration
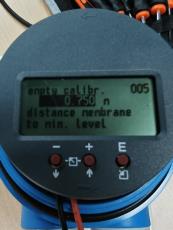
The key step is to accurately input the empty calibration as 0.750 m. The empty calibration refers to the distance from the sensor diaphragm to the lowest level, and this value directly determines the calculation basis for the ultrasonic propagation time. If there is a 5 cm error in the input value, all level measurement results will have a systematic deviation of 5 cm.
3.5 Full Value Calculation
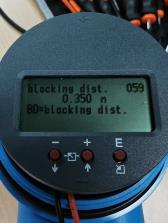
The FMU30 model has a measuring range of 8 meters, corresponding to a blocking distance of 0.35 meters. The full value equals the empty calibration minus the blocking distance: 0.75 - 0.35 = 0.400 m.
4. Verification Results
After completing the settings, slowly pour water into the bucket. The liquid level measured with a ruler is 0.08 m. At this time, the FMU30 display stably shows 0.08 m. This value is completely consistent with the measured value, and the error is less than the instrument's nominal accuracy range of ±3 mm, verifying the accuracy of the parameter settings and the reliability of the device measurement.