
Overview of COS61D Sensor Calibration and Commissioning
The calibration and commissioning of the COS61D sensor are key steps to ensure its measurement accuracy. A correct calibration process can effectively improve the reliability of the sensor in industrial process control. The following content introduces the complete operation of calibration and commissioning step by step.
Preparation Before Calibration
Required Tools and Equipment
- Calibration container
- Stirrer
- Burette
- Electrode holder
- Standard solutions (such as pure water, buffer solution, or salt solution with known concentration)
Ensure all tools are clean and in good condition to avoid contamination affecting the calibration results.
Calibration and Commissioning Steps
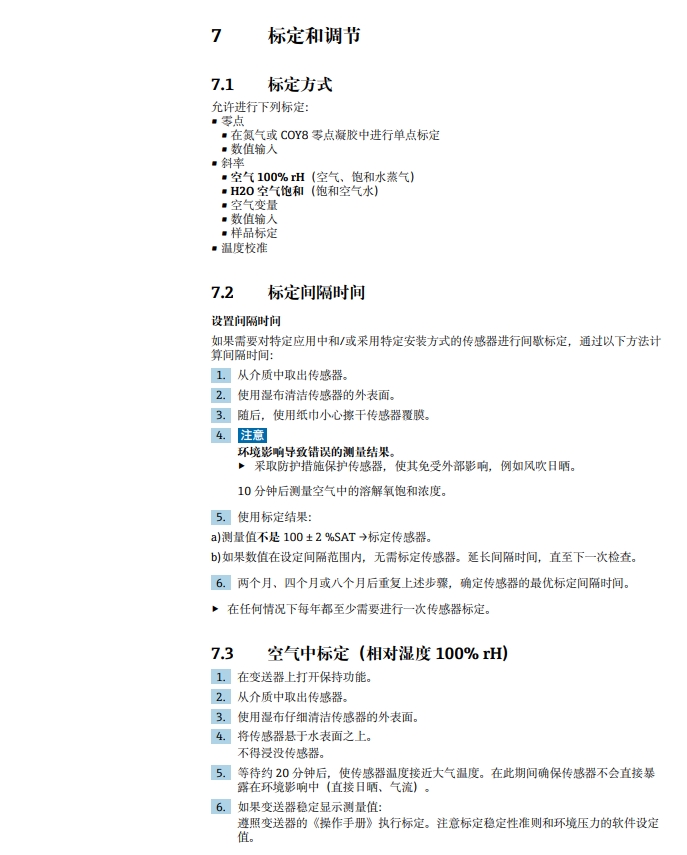
Step 1: Install the Sensor
- Place the COS61D sensor in the calibration container, ensuring good contact between the sensor and the water surface.
- Secure the stirrer to ensure uniform mixing of the solution.
Step 2: Select the Standard Solution
Select an appropriate standard solution as needed, such as pure water, buffer solution, or salt solution with known concentration. The concentration of the standard solution should cover the expected measurement range of the sensor.
Step 3: Add the Standard Solution and Stir
- Pour the standard solution into the calibration container.
- Start the stirrer to mix the solution evenly.
Step 4: Titration and Recording
- Use a burette to add a known amount of standard solution into the calibration container.
- Record the added volume and the corresponding potential value.
Step 5: Calculate Sensor Parameters
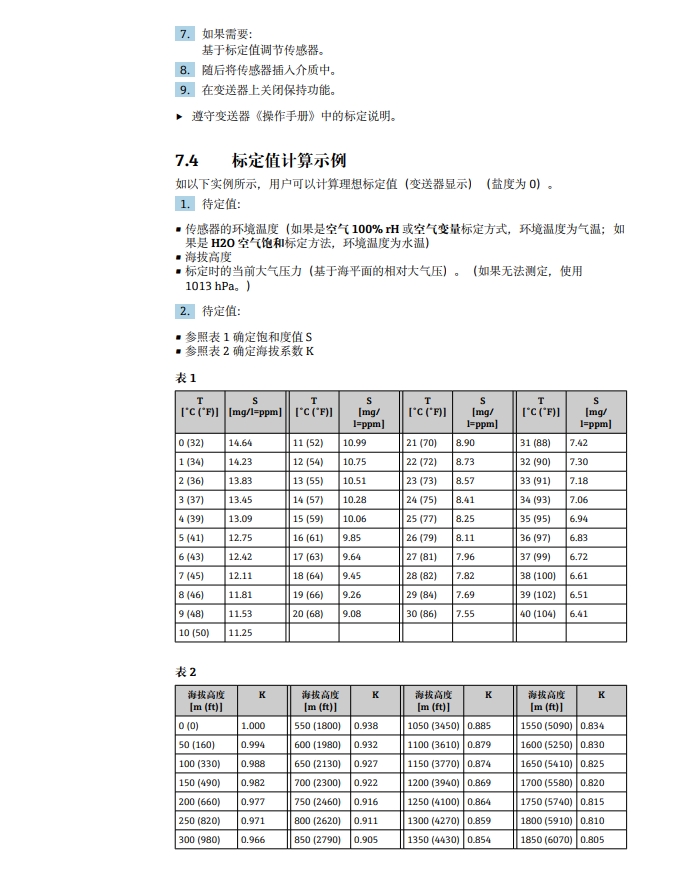
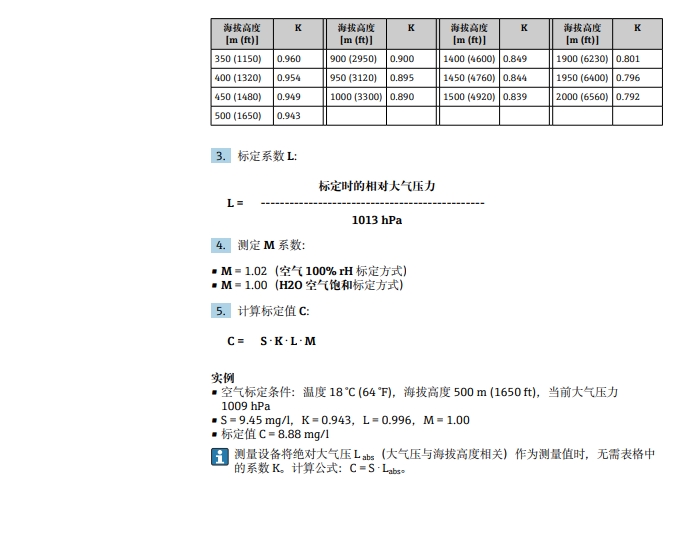
Based on the potential value and the known dissolved oxygen concentration, calculate the sensor's response slope, intercept, and response time, among other parameters.
Step 6: Repeat Calibration
Repeat the above steps multiple times to obtain more accurate results. It is recommended to perform at least three parallel calibrations.
Precautions During Calibration
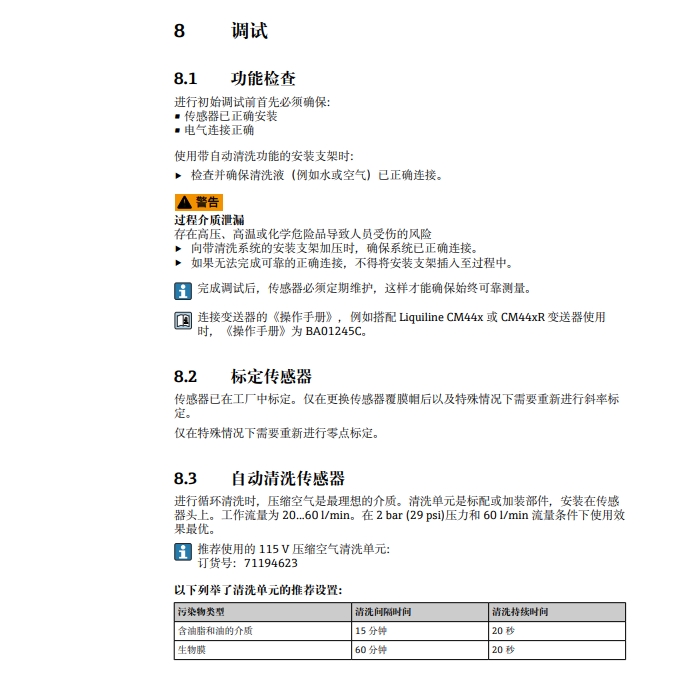
- During calibration and commissioning, pay attention to observing and recording changes in various parameters.
- If anomalies are found, troubleshoot and resolve the issues promptly.
- After calibration, verify and confirm the results to ensure the sensor can work properly and measure accurately.
Parameter Comparison and Reference
| Parameter | Description | Typical Value |
|---|---|---|
| Response slope | Slope of the relationship between sensor output and concentration | Depends on sensor model |
| Intercept | Output signal at zero concentration | Close to zero |
| Response time | Time required to reach a stable reading | <60 seconds |
For specific values, please refer to the sensor instruction manual or consult professional technical personnel.
Post-Calibration Verification
After calibration and commissioning are completed, the results need to be verified and confirmed. A standard solution with known concentration can be used for spot checks to ensure the sensor measurement error is within the allowable range.
Summary
The calibration and commissioning of the COS61D sensor require strict adherence to the steps and attention to details. Sensors from different models and manufacturers may differ, so in actual operation, it is recommended to refer to the instruction manual or consult professional technical personnel to ensure accuracy and reliability.