
Promag 10 Startup Display and Key Operation Instructions
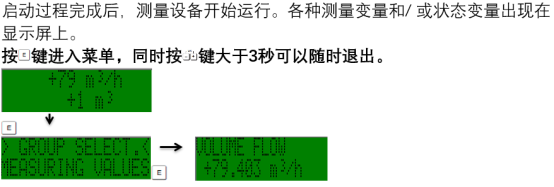
After the Promag 10 electromagnetic flowmeter is powered on, it automatically performs a self-test and displays the measurement interface. Correctly understanding the startup display information and key functions is the foundation for on-site commissioning and daily maintenance. Based on the official operation manual, this article outlines the startup process and key operation points.
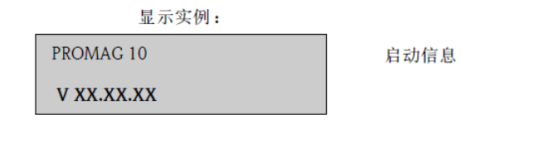
1. Startup Display Process
1. Power-on Self-test
After power is connected, the Promag 10 first performs an internal self-test, and the screen displays information such as software version and system status in sequence. After the self-test passes, it automatically enters the main measurement interface.
2. Main Interface Display Content
The main measurement interface typically displays the following key parameters:
- Instantaneous flow rate: current flow value and unit (e.g., m³/h, L/min)
- Totalized flow: forward, reverse, or net total
- Alarm status: if there is an alarm, an alarm icon or code is displayed
- System status: such as empty pipe detection, excitation status, etc.
2. Key Functions and Operations
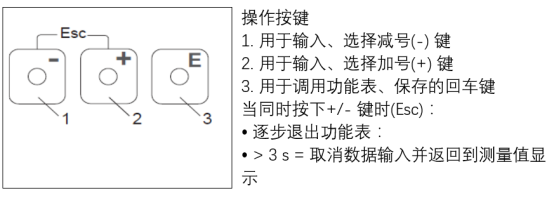
1. Key Layout
The Promag 10 is usually equipped with four operation keys located below the display. The functions of each key are shown in the following table:
| Key | Label | Function Description |
|---|---|---|
| Left key | +/- | Switch display parameters or modify values |
| Middle key | E | Enter menu, confirm selection |
| Right key | → | Move cursor or exit current menu |
| Combination keys | + and - | Press simultaneously to return to the previous menu or cancel operation |
2. Basic Operation Steps
The following are common operation procedures:
- View totalized flow: On the main interface, press the left key to switch the display until the totalized flow value appears.
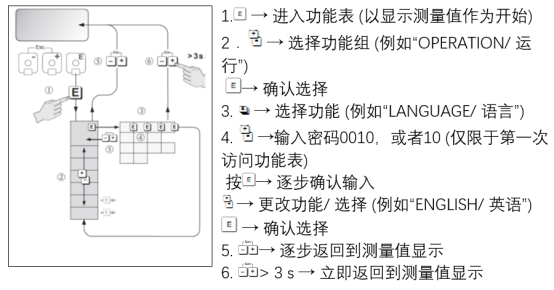
- Enter menu: Press the middle key E to enter the main menu, and use the left or right key to select menu items.
- Modify parameters: After selecting a parameter, press the E key to enter edit mode, use the left key to adjust the value, use the right key to move the cursor, and press E to confirm.
- Exit menu: Press the right key to exit step by step, or press both left and right keys simultaneously to return directly to the main interface.
3. Precautions
- Before operation, please ensure you have read the complete manual to avoid accidentally changing parameters and affecting measurement.
- If an alarm code is displayed, please troubleshoot the fault before continuing operation.
- Key response may vary slightly due to ambient temperature or protection class, which is normal.
- If there is no operation for a long time, the display may automatically return to the main interface or enter screen saver mode.
4. Summary
Mastering the startup display and key operations of the Promag 10 can significantly improve on-site commissioning efficiency. It is recommended that engineering personnel combine this article with the device manual to familiarize themselves with the menu structure and common functions, ensuring stable operation of the flowmeter.