
Promass 83 Zero Point Adjustment Overview
Zero point adjustment is a key step before commissioning or during regular maintenance of the Promass 83 Coriolis mass flowmeter, used to eliminate zero point drift caused by installation stress, temperature changes, and other factors. Correct zero point adjustment ensures that the flowmeter maintains high accuracy during low flow measurement. This article is based on the Endress+Hauser operating manual and provides a detailed introduction to the adjustment process.
Preparation Before Zero Point Adjustment
Before performing zero point adjustment, the following conditions must be met; otherwise, the adjustment result will be invalid or may even damage the instrument.
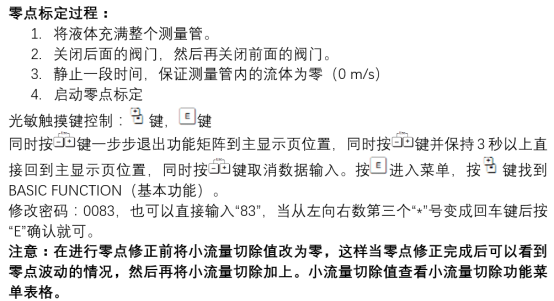
- Pipe completely full: The fluid must fill the measuring tube, with no bubbles or empty pipe.
- Fluid stationary: Close the upstream and downstream valves to ensure zero flow.
- Temperature stable: The fluid temperature and the instrument ambient temperature must be in equilibrium, avoiding severe fluctuations.
- Stress-free installation: Check pipe supports to avoid additional stress.
Zero Point Adjustment Operating Steps
Manual Zero Point Adjustment
Manual adjustment is performed via the transmitter local display or FieldCare/DeviceCare software, suitable for routine maintenance.
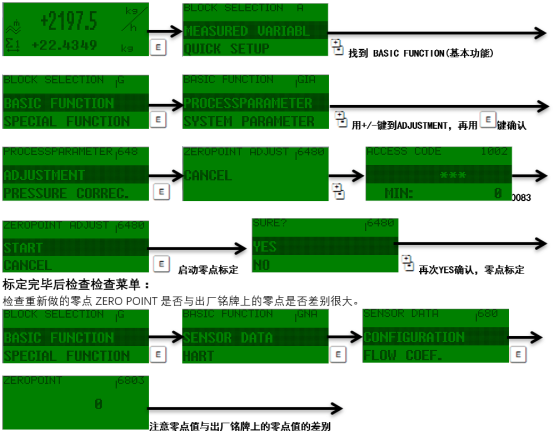
- Enter the main menu and select “Setup” → “Zero point adjustment”.
- Confirm that the pipe is full and the fluid is stationary, then press “OK” to start the adjustment.
- Wait for about 30 seconds; the instrument automatically completes the zero point calculation and displays the new zero point value.
- Press “OK” to save and return to measurement mode.
Automatic Zero Point Adjustment
Some models support automatic zero point adjustment, triggered via relay or digital input, suitable for automated systems.
- Configure the digital input function as “Zero point adjustment”.
- Trigger the signal; the instrument automatically performs zero point adjustment, with a process similar to manual adjustment.
- After adjustment is complete, check whether the status output is normal.
Precautions and Parameters for Zero Point Adjustment
The following parameters and precautions directly affect the adjustment result; please pay close attention.
| Parameter/Item | Description | Recommended Value/Requirement |
|---|---|---|
| Zero point adjustment time | Automatic calculation time of the instrument | About 30 seconds; keep fluid stationary during this period |
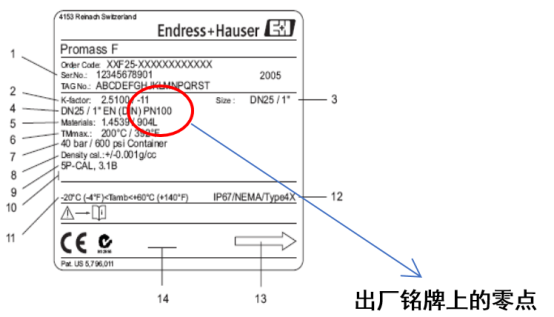
| Allowable zero point deviation | Deviation between adjusted zero point and factory value | Usually <0.1% FS; if too large, check installation |
| Fluid conductivity | No effect on Coriolis force, but watch for bubbles | Ensure no bubbles |
| Ambient vibration | Vibration introduces noise | Avoid strong vibration |
Note: If the zero point is still unstable after adjustment, check whether the pipe is full, whether the valve has internal leakage, and whether the sensor has scaling. If necessary, perform restore factory zero point or contact the manufacturer.
Common Problems and Solutions
- Zero point adjustment fails: Check whether the fluid is stationary and the pipe is full, then adjust again.
- Large zero point drift: Check installation stress and temperature changes; reinstall or wait for temperature to stabilize.
- Large measurement error after adjustment: Confirm whether full-scale calibration was performed after zero point adjustment; recalibrate if necessary.
By following the above steps, Promass 83 zero point adjustment can be effectively completed, ensuring long-term stable operation of the flowmeter.