
Promag 53 User Interface Overview
The user interface of the Promag 53 electromagnetic flowmeter is designed to be intuitive, facilitating on-site operation and parameter configuration. The interface mainly consists of a display module and operation keys, supporting multilingual menus and quick navigation. The following content will guide you through the basic setup.
Display Module and Key Functions
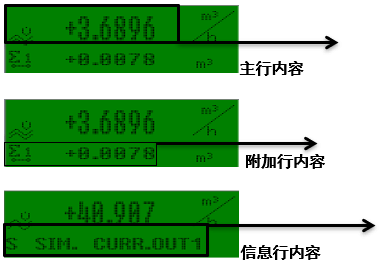
Display Module
The display module uses a backlit LCD screen, which can simultaneously display flow rate, totalizer, and status information. It is clearly readable in both bright light and dark environments.
Operation Keys
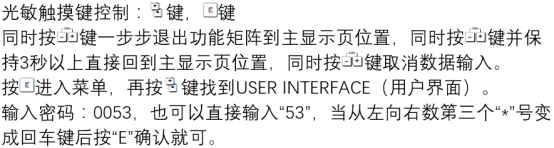
The instrument is equipped with four optical keys, which can be operated without opening the housing. The key functions are as follows:
- +/-: Increase/decrease values or scroll through menus
- E: Confirm selection or enter the next menu level
- ESC: Return to the previous level or cancel operation
Menu Navigation and Parameter Setting
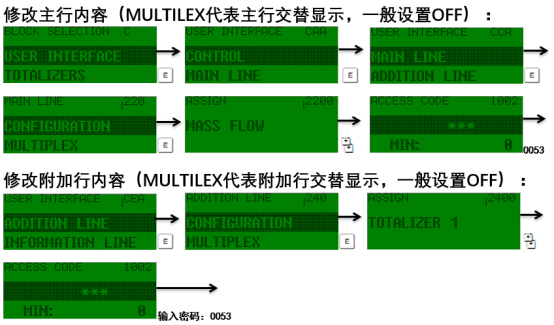
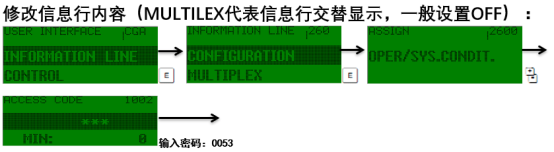
Menu Structure
The menu uses a hierarchical structure, divided into main menus, submenus, and parameter items. Commonly used functions such as measurement units, measuring range, and damping can be accessed quickly.
Setting Steps
Taking modifying the measurement unit as an example, the operation steps are as follows:
- Press the E key to enter the main menu.
- Use the +/- keys to select the "Setup" menu, and press E to confirm.
- Select the "Units" submenu, and press E to enter.
- Select the desired unit (e.g., m³/h), and press E to save.
- Press ESC to return to the measurement screen.
Common Parameters and Factory Defaults
The following table lists the factory default values of some key parameters for reference during setup:
| Parameter | Default Value | Description |
|---|---|---|
| Measurement Unit | m³/h | Volumetric flow unit |
| Measuring Range | 0-10 m/s | Corresponding flow range |
| Damping Time | 1 s | Output response speed |
| Empty Pipe Detection | On | Ensures measurement reliability |
Notes
- Before modifying parameters, record the original values for restoration.
- Ensure the instrument is in programming mode, otherwise modifications cannot be made.
- After setup is complete, it is recommended to perform a zero point calibration.